I've seen how helpful a good planogram can be for small stores. Since I've gotten questions about them, I want to share tips on making a planogram. This can:
- Optimize your store layout
- Boost sales
A planogram shows:
- What shelves products go on
- How to arrange products on shelves
The goal is to make shopping easy and encourage customers to buy more.
Why Planograms Matter for Retail Shops
Planograms are visual representations of your shop's layout, showing where products are placed and arranged. For most of us in retail, nothing beats a planogram to show visually what's happening in the shop.
A Cautionary Tale
Let me share a quick story. I had a client who had an ugly shop fit-out. When I talked to her about it, she told me that her partner was a carpenter who said, "I'll do it however you want." So she told him what she wanted, and he built it. Then she looked at the finished product and said, "This is what I asked for but not what I wanted." A planogram could have saved her a lot of disappointment.
Uses of Planograms
- Maximising sales by product placement
- Improving customer flow
- Optimising shelf space optimization
- Enhancing visual merchandising
- Tracking profit
- Identifying shoplifting hotspots
- Analysing the number of sales per area
I've had clients whose sales have jumped by tweaking their store layout based on a well-crafted planogram.
The Great Debate on Professional Planogram Software
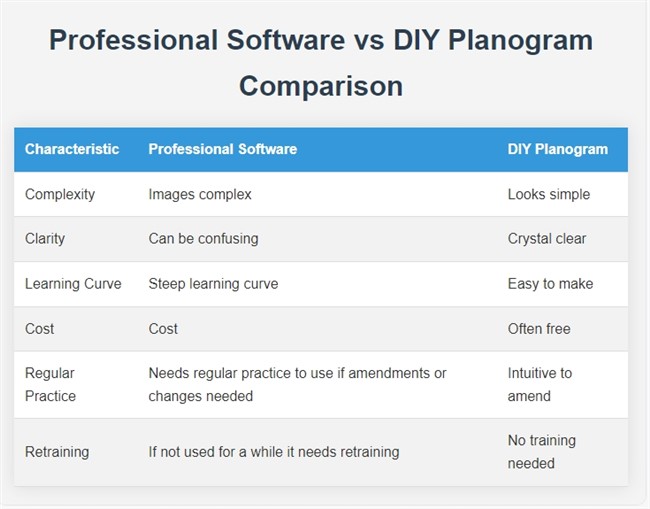
When I started discussing planograms, our competitors all suggested that people use professional packages. Now, you can use professional software, and its costs are pretty reasonable. However, they did not notice that these planograms look nice and are not straightforward to make or use.
Pros and Cons of Professional Software

Professional planograms: you need to learn much before using them effectively. In my experience, if you're considering getting professional planogram software, I suggest purchasing one with a monthly subscription. These costs are relatively reasonable; you have lost little if the package fails. Here is a decent discussion on this.
Most of us would be better off hiring someone who knows what they are doing rather than buying or renting such software.
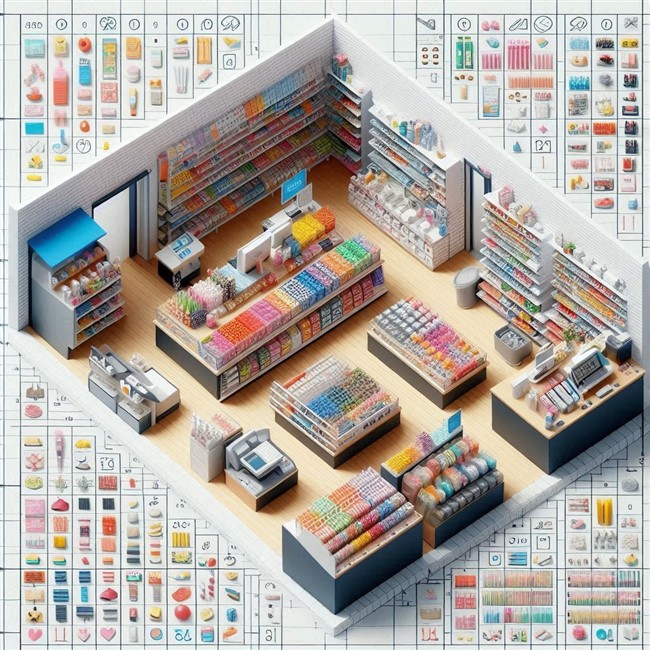
Here would be a typical result from a professional planogram.

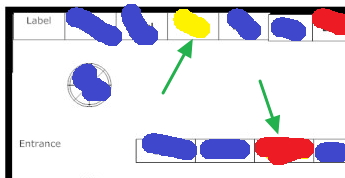
Here is a manual one.

A diagram of your shop with your best sellers listed as
Blue = Good
Yellow = Moderate to bad
Red = Very bad
blank = Zero
It visually shows the shop's sales, but there is no denying that the professional one has a better look. However, I think the manual is clearer.
Step-by-Step Guide to Making a Planogram
Step 1: Gather Your Tools
You'll need:
- A couple of large sheets of paper
- Some grid paper
- Pencil and eraser. A pencil's significant advantage is that, unlike a pen, it's easy to rub out mistakes.
- Ruler
- Triangle Right Angle ruler
- Ruler with shapes (circles, triangles, squares) if possible
- Tape measure or Laser Distance Meter
Pro tip: I prefer a Laser Distance Meter. They're relatively cheap now; one person can do all the measurements quickly.
Step 2: Measure Your Shop
- On grid paper, draw a rough outline of your shop.
- Measure the largest dimension of your shop.
- Write down this measurement on the grid paper.
- Start at the rear of the shop and go around, measuring the outer parts. Write down every measurement.
- Go from the rear left of the shop and measure important details from left to right.
- Work your way to the front.
- Double-check by measuring from front to back.
Step 3: Draw Your Layout
- Start with the rough sketch to get a grip on the situation.
- Check on the grid that the measurements make sense.
- Do not kid yourself if it's all correct; there is something you have done wrong.
Step 4: Draw Your Final Draft
- Grab the larger paper to draw your shop layout.
- Get the larger measurement (generally the shop length first)
- Use this measurement to make a scale on your paper. Use a decent scale (e.g., 1 cm = 1 metre, 2 cm = 1 metre).
- Draw the other measurements.
Pro tip: In my experience, even experts need a few attempts. If you're not doing it a lot, you may need more. That's perfectly normal!
Step 5: Use Your Planogram
Once you have a decent planogram, make many copies. Later, you'll use these for different objectives.
Conclusion
By taking the time to create a planogram, you're investing in your shop's future. Improving your layout, customer flow, and bottom line is a good step.
Happy planograming!
FAQ
Q: What is a planogram?
A: A planogram visually represents some of your shop's features.
Q: Why do Planograms Matter for retail shops?
A: Planograms help people visualize what is happening in the shop. They assist in optimizing space, improving customer flow, and maximizing sales.
Q: Do I need professional planogram software?
A: Not necessarily.
Q: How do I start creating a planogram?
A: Starting with the most significant dimension, the shop's length.
Q: What's the best way to measure my shop?
A: A laser distance meter is recommended as it's quick, accurate, and can be operated by one person.
Q: How many attempts does it usually take to create one?
A: Even experts typically need three attempts: a rough sketch, a detailed version, and a final draft.
Q: What scale should I use when drawing one?
A: Something that is easy to calculate.
Q: Why should I make many copies?
A: Multiple copies allow you to use the planogram for different objectives and planning purposes.
Q: Can a planogram help prevent layout mistakes?
A: A planogram can help visualise the layout before implementation, potentially avoiding costly mistakes in shop fit-outs.


