
Step-by-Step Guide to Showcasing your Products with Pictures
If you have a customer display, customers like to see a picture of the item as it is scanned. The image is superior to writing as it is much easier to see than writing on the screen. Additionally, it is helpful because others in the queue can observe what people are purchasing from you at a distance. This is a simple way of making you look more professional, increasing sales and improving your service.
To do this, you need to add photos to your stock items. It is simple, and I will show you how to do it here. If this all will sound hard, it is not, and it is a valuable skill you will find helpful outside of work.
Preparation
You only need to do some things in the shop; the top 50 items are often enough to start. Once you get going, you can always get more.
So what we need are our top 50 items to start. You know it already, but if you want a computer listing, do the following.
Follow this, and in this instant, you can precisely know, track, and control your top-selling products in real time.
Go to Register reports.

Now pick "Top N Stock Sales for a Given Period." I suggest the last two months.
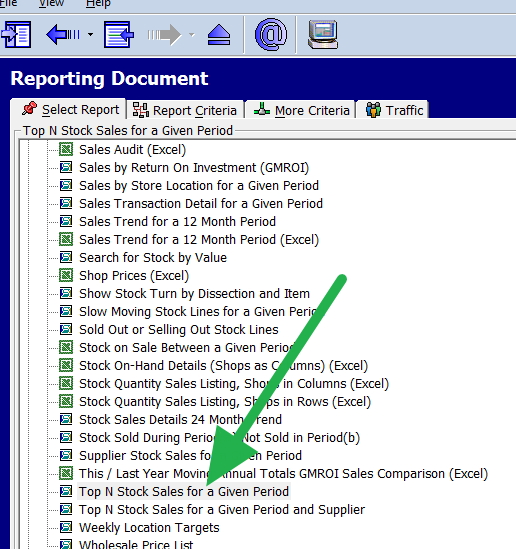
Now you have your hot list, which took less than a minute to do.
A bonus here is that you will see items you may find much more interesting here.
Getting the photos
It is not hard, and over the years, I have changed my mind about the quickest and easiest way to get the photos.
Ask your supplier (Old method)
You can ask your suppliers.
Pros: These photos are often perfect.
Cons:
> Each supplier handles only a small number of your products. There are many suppliers to ask.
> It's a hassle to find the right person in an organisation to ask
> Surprise they do not have everything
> It takes ages to get it
> Often, the photo is in strange computer formats that are hard to use.
Now, this is the big problem. The pictures are not yours. I have spoken to several suppliers on my client's behalf and told them they could use them verbally, but only some have agreed in writing. Even if they put it on paper, which is rare, clauses are attached.
Royalty-free places on the web
There are many royalty-free places on the web where you can get them.
For example, there are many royalty-free places on the web to get them.
https://pixabay.com/en/photos/
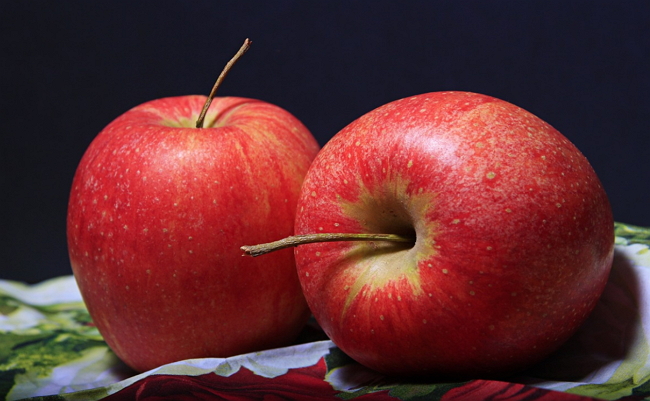
I grabbed a picture of an apple from one of them.
Pros: Good photos
Cons:
> The big problem is, besides some standard groceries like the apples above, it's hard to get branded items. No one will be happy if, for butter, you show a genetic picture or, even worse, an image of butter from another brand.
> It takes time to find the images
>Legal problems might arise.
Get a professional photographer.
Pros: Good pictures
Cons:
> costs.
> Lack of flexibility
Do it yourself.
Having done it a few times, I have found it quick and easy to do with a modern smartphone. Modern smartphones are more than good enough.
You will need a tripod. A decent one is about $30. If you do not have one, well, get one before starting.
You are looking at an hour and a half of work.
Set-Up
A bathroom works great if it has a window to the sun. Set up a table in the room, put some cardboard on the table, and you are off.
If you want something better, you will need a reading lamp, a large cardboard box, oven paper, white cardboard, the smartphone and then watch this youtube explaining how to do it.
Set up your photo area. Remember that in photography, lighting is crucial, especially when taking pictures of small things. Now take pictures of a few sample items. You must ensure your items are well-lit and do not have shadows.
Set the image setting on the camera.
Adjust the image settings on your smartphone until you achieve a good visual output. While professionals may prefer manual settings due to their experience and knowledge, amateurs with limited knowledge will find the automatic mode more suitable for their needs. So I suggest using an automatic setting here.
Activate burst mode's automatic setting on your smartphone.
When you are happy with the pictures you get, you can start photographing your items.
Preparing your stock items
It works better with two people. One positions the items, cleans and takes the pictures, and the other collects them, bringing them in and then putting them back.
Before the photo is taken make sure your items are clean and free of fingerprints and dust.
Taking the picture.
It's time to take the pictures.
> Put the item in; while doing this, consider its position. Most items are best shown from an angle.
> Take about five to ten shoots per item.
Putting in your computer
There are services like google photos that will automatically move the images from your smartphone to your computer. Use one such service. After they are in your computer, review each stock item and select the best one while deleting the others. Avoid taking excessive time deciding which to pick. If it is hard to determine, it does not matter which one you choose for this purpose.
Adding the Photos to Your Stock Items
Now that your pictures are prepared, it's time to add them to your stock items.
Now call up the item you wish to add the photo, for example, here oranges
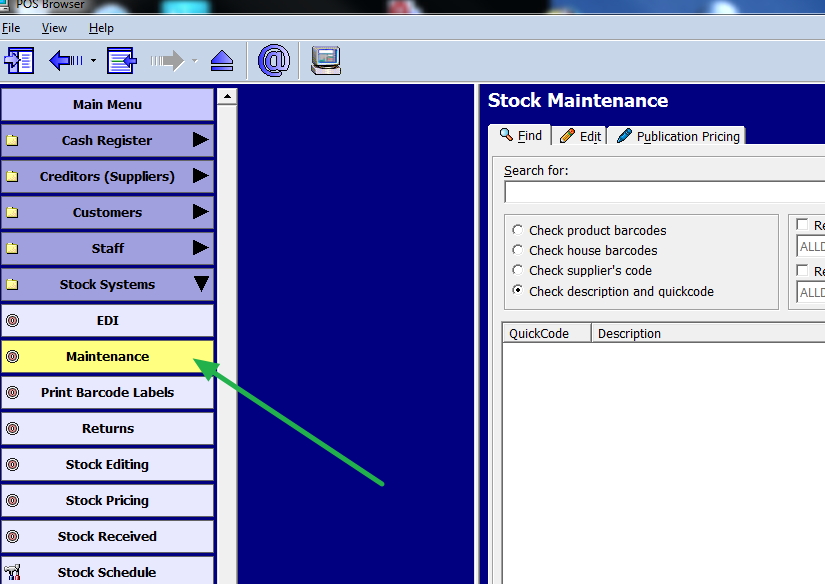
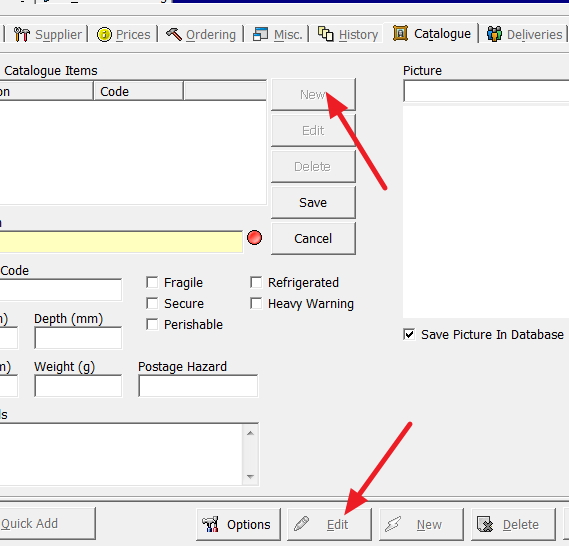
Now go into stock maintenance.
Now call up the item, here it will be oranges
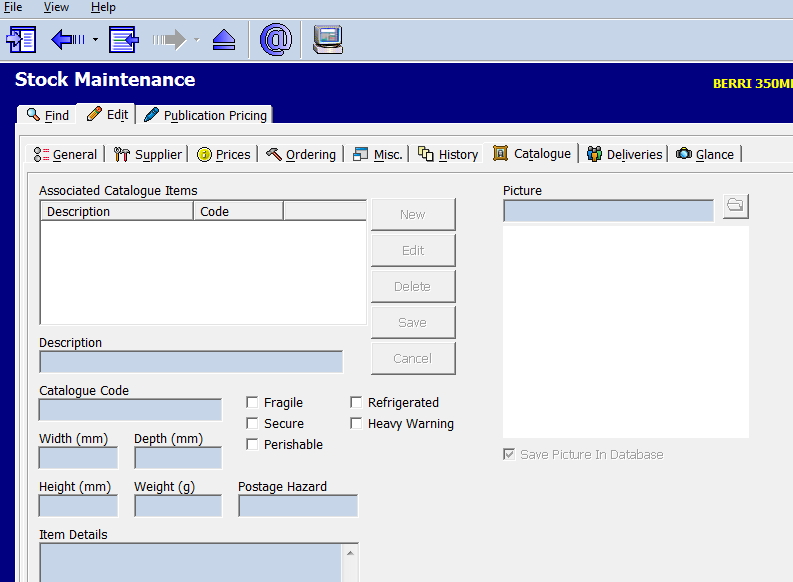
After that, go to the catalogue section, click edit and then new to add a new photo.
Then select my image and save it.
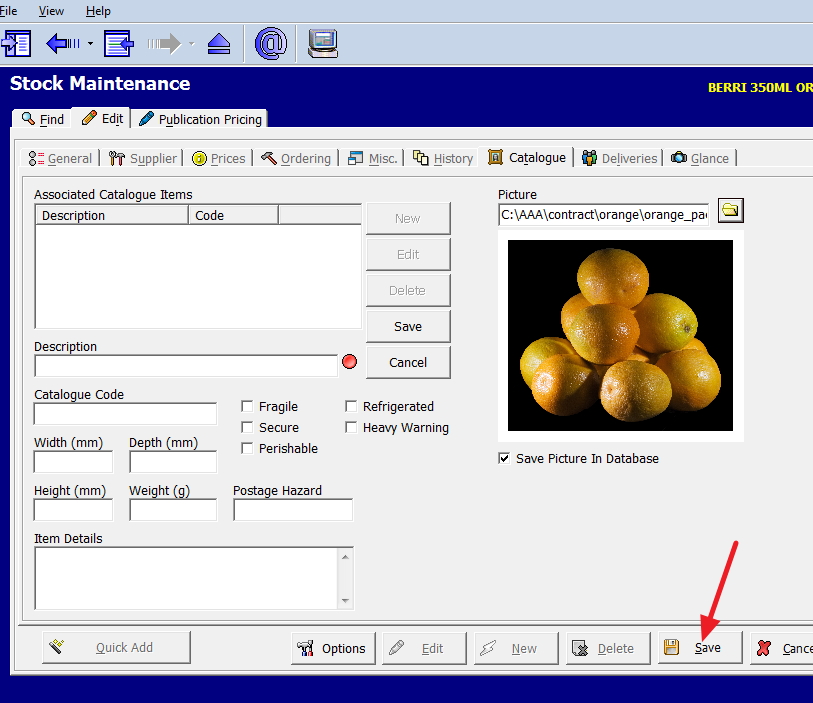
Now you have attached the image.
Conclusion
Including pictures of your stock items can help improve the appeal of your listings and boost sales. You can easily take great photos and add them to your stock items by following these steps and tips.
Enjoy your photography!